Tuesday, April 26, 2011

Interior Paint

Today lots of bits for the interior were painted a light saddle color to match the dash pad. Next up will be the trunk area and back section of the interior that go red. 
 The first attached part of the body to receive final paint was the center console where the radio and heater controls go.

Here's the cover that goes under the steering wheel and the defroster vent bezels.

The passenger panel in front of the heater.

 The top of the instrument cluster and the button from the shifter. The shifter knob itself will be covered in matching leather. 

Another shot of the top of the instrument cluster.  

 Speaker bezel and grill, steering column cover and upper housing that goes on the column and holds turn signal and horn switch.

Package tray, steering column and front of upper instrument cluster.

Lower section of the instrument cluster. 

Saturday, April 23, 2011

Bath Time

Spent some time doing a little more degreasing on the chassis, then put the new exhaust in place, then took a few pictures of it as it sits today. 


Friday, April 22, 2011

Got Exhaust

Several weeks ago, ordered tubing from Summit to fabricate the exhaust from the headers back, and a pair of Flowmaster Hushpower mufflers, to give the car a tone a bit more civilized than the standard Flowmaster sound. After a failed attempt to buy a welder (Guys never bring your conscience, I mean wife, along on a tool shopping expedition), decided to see if my former neighbor would do the job.

Aaron runs Orange County Hot Rods, and does mobile fabrication. Three and a half hours after he arrived, we had the whole system done. My sole fabrication contribution was cutting down a couple chunks of 3 1/2 tubing to make the sleeves for the joint to be able to disassemble the system at the stainless band clamps. It took well under two J bends from the collectors to the mufflers, and a couple 4' long chunks of 2 1/2" aluminized tubing. The tailpipes were salvaged from the last system - they were in great shape and worked after a mild trim for the new muffler locations.
I had a can of high temp silver exhaust paint, so after Aaron left, I cleaned things up and painted all the tubes.

Sunday, April 3, 2011

Time to Hustle

With the progress at the bodyshop, it's time to go into high gear at home. I ordered most of what I need for reassembly from Corvette Central. It's been like Christmas around here for the past month, at least for me, with UPS delivering a few times a week. I also ordered the hushpower mufflers and mandrel bends to put the new exhaust on the car. I've got a fabricator coming by the house to size up the job.

With my wife back in South Carolina at her sister's this weekend, it was a car weekend. Hit the local parts store to order a new power steering rack and pump. It will be in later this week. With that on order, I put my attention on the front end. Prior to the move I couldn't find the lowering blocks for the front spring, so I never pulled the spring when I had the control arms off. I also hadn't gotten the front shocks, so I ordered those up with the mufflers.

Saturday was mostly disassembly, and modifying the spring. I pulled the spring and took the sawzall to the thick rubber blocks on the top, then took the rest of the rubber off with a razor blade, and cleaned it up with a sanding disk on an angle grinder.


On top of the spring you can see the new angled wedge, gooped up with lithium grease. 
Installing the shocks was challenging - with little weight on the chassis, the suspension isn't settling much, so I had to get creative. 


 Here's my creativity - one of my pipe clamps between the bottom of the lift crossbeam, and the top of the radiator mount. One and a half inches of tightening, and the shocks finally fit. 


Here's the left side buttoned up except for the steering rack. Lost a half hour looking for the shock bolts. After several boxes, finally found the bolts and the sway bar end links in a box on my bench that I moved the brake calipers in. Note to self - don't move with a car in a thousand pieces.


Here's the right side in the same state. I can probably put the grease fittings in the lower control arm now - shouldn't have to set the ball joints on blocks any more now that things are reassembled. 

Aprilish

That's what's written on the board at the shop - Mutt will be painted Aprilish. Well now it's April, and I have a painted hardtop in the stock Ermine white, the same color the coves will be painted. That's the only stock color going on the body or in the interior. The body will be Victory Red, not Crystal Red. Crystal Red is a metallic color used on C6 Corvettes. It's also unobtainable today, due to the horrific earthquake and tsunami in Japan last month. From the Wall Street Journal "The pigment is called Xirallic and is only produced at an Onahama plant owned by Merck KGaA, a German chemical company. Onahama is a town on the Japanese coast where citizens are still struggling to recover from the devastating earthquake and tsunami that struck Japan earlier this month. In the wake of the tsunami, the town has been exposed to the radiation leaking from the Fukashima nuclear reactor."

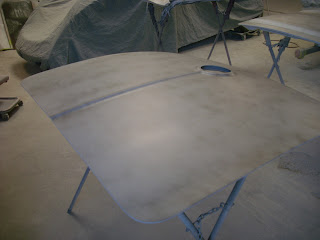
Here's the hardtop after it was painted. It's now home, along with a pile full of parts from Corvette Central to put it back together - new headliner, new gaskets, new side and rear plexiglass, new hardware.


 The underside of the hood. Ron modified it to ensure there's plenty of room for the power booster. I didn't swap to a hydraulic booster, so make sure there's plenty of room. 


 Here's Ron and Jason shooting the second round of primer on the car. In front of the car are a number of other panels from the car. To the left of the paint booth there's a bunch of banners on the wall. On Tuesdays, the 1941 Willys under the car cover comes out for the filming of Cut, Chop and Rebuild for the Speed Channel. Mutt may get a cameo after she's in color.


Mutt

Trunk lid ready for final sanding before color. 


Same for the hood.  


And the deck lid. There's a second deck lid somewhere in the shop. The other one goes with the rollbar. 


Nose of the car after second round of priming. The black guide coat will help Ron see any low spots.


The rear quarter after Ron started blocking. Goal was to block the car, pull the doors, then prime the jambs. 


Ron Priming the trunk, jambs and center console. The car is all primed except for the engine bay. 


The small parts are also getting ready for paint. Here's the cowl vent, gas door and glovebox - the only steel parts on the body. The potmetal headlight trim rings don't count.